
How Many Recessed Lights Do You Need for a 12×15 Living Room? (Lumens Math)?
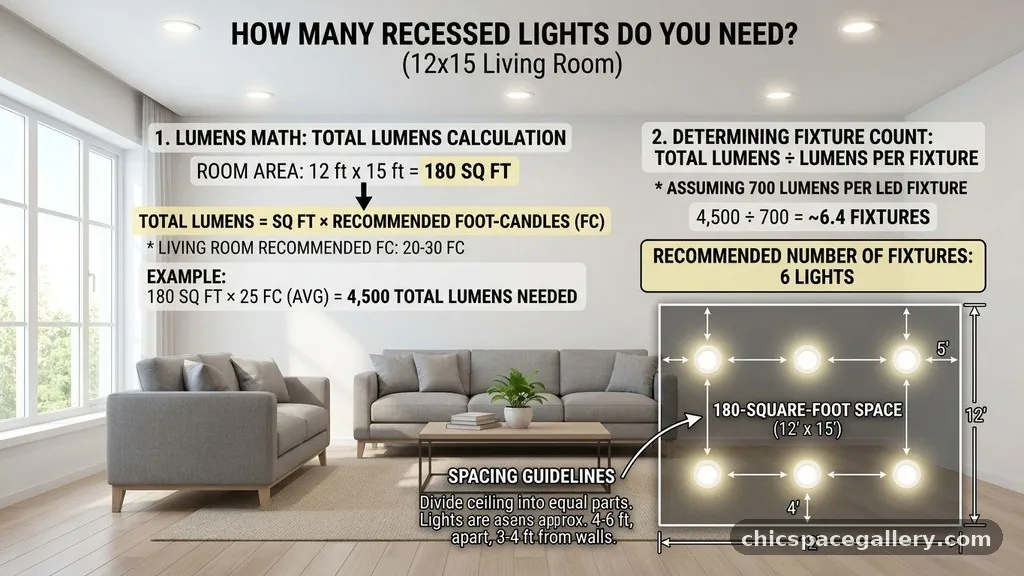
Figuring out how many recessed lights do you need for a 12×15 living room? (Lumens Math) requires a balanced approach to brightness and layout. A 180-square-foot space typically requires between six and nine recessed fixtures depending on your target light intensity.
By understanding the relationship between floor area, light output, and ceiling height, you can ensure your space is evenly illuminated without creating harsh glare. This article breaks down the essential calculations to help you plan an effective lighting scheme that meets your specific functional and aesthetic needs.
Determining the Fixture Count for a 180-Square-Foot Space
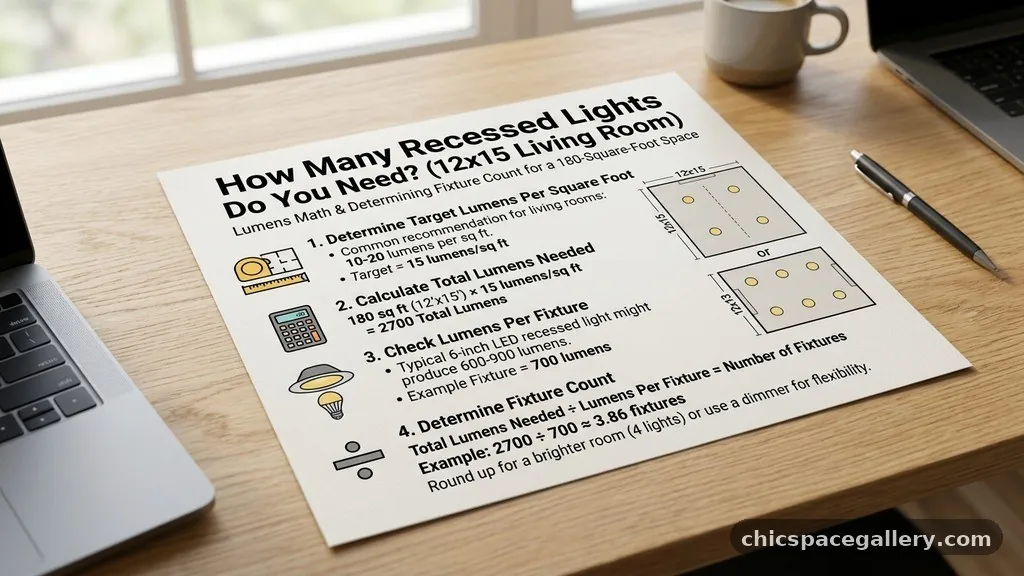
For a standard 12×15 living room, you will generally need six to nine recessed lights to provide adequate general illumination. This estimate assumes the use of standard LED downlights producing roughly 600 to 800 lumens each.
If you prefer a brighter, more clinical environment, lean toward nine fixtures. For a cozy, relaxed atmosphere, six well-placed lights often suffice.
The math starts with your total square footage, which is 180 square feet. A common rule of thumb suggests providing 20 lumens per square foot for ambient lighting.
This target results in a total requirement of 3,600 lumens for the entire room. Dividing 3,600 lumens by the output of a single 600-lumen LED fixture gives you a base requirement of six lights.
If your living room has darker walls or furniture that absorbs light, you should increase your fixture count. Dark surfaces reduce the efficiency of your lighting, meaning you need more sources to achieve the same perceived brightness.
In such cases, opting for eight or nine lights ensures the corners of the room remain well-lit. You can always use a dimmer switch to dial back the intensity if the room feels too bright after installation.
Understanding the Role of Lumens in Lighting Design
Lumens measure the total amount of visible light emitted by a source. Unlike watts, which measure energy consumption, lumens tell you exactly how bright your room will be.
When you ask how many recessed lights do you need for a 12×15 living room? (Lumens Math) is the most accurate way to find the answer. Modern LEDs have transformed this calculation because they produce significantly more light while using less power.
Most residential recessed fixtures fall into the 600 to 900-lumen range. When selecting your lights, check the packaging for the “lumen output” rather than the “wattage equivalent.”
A fixture labeled “60W equivalent” usually provides about 800 lumens. If you choose higher-output fixtures, you may need fewer of them to reach your target, but this can lead to uneven light distribution.
Consistent light distribution is often more important than raw lumen output. Placing fewer, high-lumen lights creates “hot spots” directly underneath the fixture and deep shadows in the areas between them.
Spreading out more, lower-lumen lights creates a softer, more uniform glow across the entire floor. This approach makes the room feel larger and more inviting for guests.
Calculating Light Spacing for Even Illumination
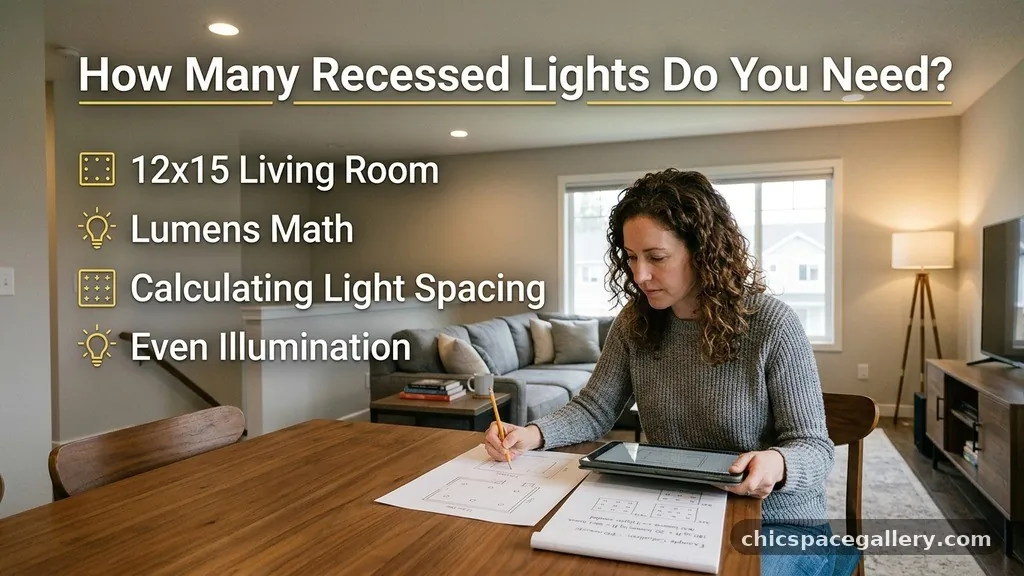
Proper spacing prevents the “Swiss cheese” ceiling effect where lights are placed too close together or too far apart. A general guideline is to divide your ceiling height by two to determine the distance between fixtures.
For a standard 8-foot ceiling, placing your recessed lights 4 feet apart is a reliable starting point. This ensures the light cones overlap correctly, eliminating dark zones on the floor.
When planning your grid, measure the distance from the walls first. You should place your first row of lights about 2.5 to 3 feet from the wall.
This placement highlights the vertical surfaces and creates a sense of depth in the room. If you place them too close to the wall, you might create distracting scalloping effects that draw attention to imperfections in the drywall.
Spacing Strategies for Different Room Layouts
- Maintain a 3-foot buffer from corners to prevent corner glare.
- Align lights with the center of furniture groupings for task-oriented illumination.
- Avoid placing lights directly over televisions to prevent screen reflections.
- Use a staggered grid pattern to cover wider areas more effectively than a standard square grid.
The Impact of Ceiling Height on Fixture Selection
Ceiling height significantly influences how light travels through a room. Higher ceilings require fixtures with wider beam angles to ensure the light reaches the floor surface effectively.
If you have 10-foot or 12-foot ceilings, you may need to increase your lumen output per fixture to compensate for the distance the light must travel. Standard 8-foot ceilings are the most forgiving and work well with narrow or medium beam spreads.
For taller ceilings, you might consider using “wall wash” trims. These specialized trims direct light toward the walls rather than straight down to the floor.
This technique makes the room feel taller and more expansive by highlighting the vertical plane. It also helps reduce the number of direct downlights needed for general visibility.
If your ceiling is sloped or vaulted, you need adjustable gimbal trims. These allow you to aim the light downward even if the ceiling surface is angled.
Without gimbals, your light would hit the floor at an awkward angle, causing uneven shadows. Always check the specifications on your recessed housing to ensure it is rated for the angle of your ceiling.
Comparing Lighting Requirements by Room Usage
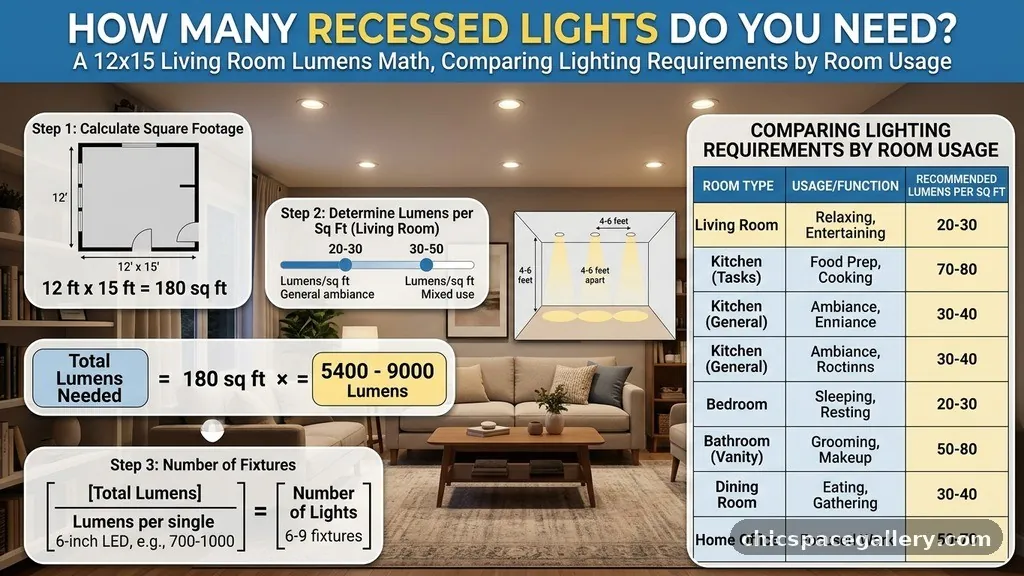
The number of lights you need depends heavily on how you use the living room. A space used primarily for reading or family activities requires more illumination than a room used only for evening television viewing.
You can categorize your lighting needs based on the primary function of the room. Refer to the table below for a quick comparison of intensity requirements.
| Usage Type | Target Lumens (per Sq Ft) | Recommended Fixture Count |
|---|---|---|
| Casual Lounge | 15-20 | 6 |
| Multi-purpose/Reading | 25-30 | 8 |
| High-Activity/Crafts | 35+ | 10+ |
If your living room doubles as a workspace, you should prioritize task lighting. Instead of adding more recessed lights across the whole ceiling, install dedicated task lamps or under-cabinet lights where needed.
This keeps the ambient light in the living room comfortable while providing high-intensity light exactly where you need it for work. You can find more details on energy-efficient lighting standards through official government resources.
Selecting the Right Trim and Housing
The trim you choose affects both the aesthetic of the room and the quality of the light. Baffle trims have internal grooves that help reduce glare, making them ideal for living areas.
Reflector trims are smoother and more efficient, bouncing more light into the room, but they can be harsher on the eyes. If you want a modern, clean look, consider “pinhole” or “eyeball” trims that hide the bulb from view.
Housing types are equally important, especially regarding safety and insulation. If your living room is on the bottom floor of a two-story home, you need IC-rated (Insulation Contact) housings.
These are designed to be in direct contact with ceiling insulation without overheating. If you are installing lights in a drop ceiling, shallow-depth housings are available to fit into tight spaces.
Always ensure your electrical boxes are compatible with the weight of your chosen fixtures. Modern LED “wafer” lights are extremely lightweight and don’t require heavy housings, making them a popular choice for retrofitting.
They clip directly into the drywall, saving you time and effort during the installation process. Just ensure you have enough clearance behind the ceiling material to accommodate the junction box.
Integrating Dimmers for Total Control
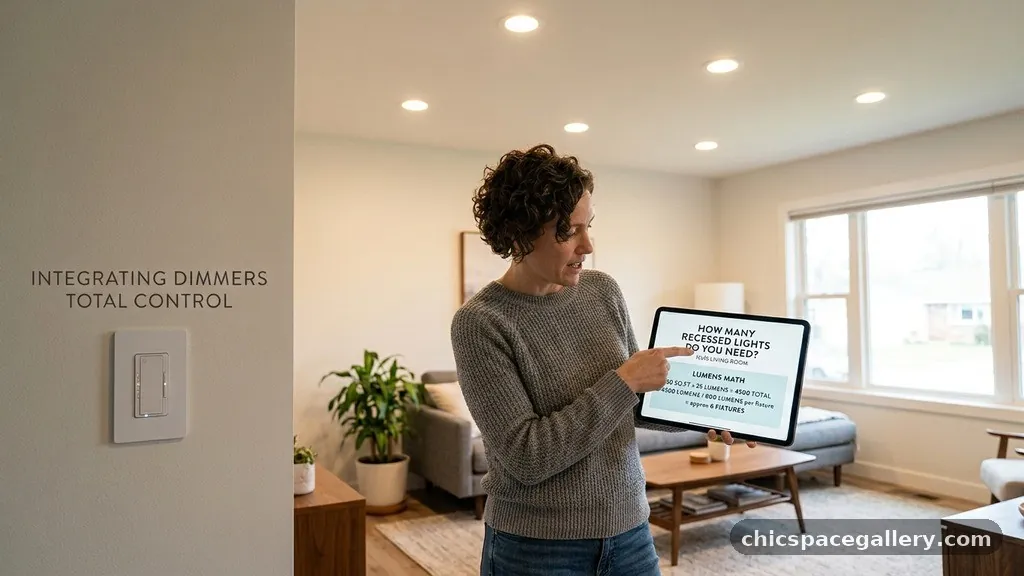
A dimmer switch is non-negotiable for a living room with recessed lighting. It allows you to transform the room from a bright, functional space into a cozy, dim environment for movies or relaxation.
When planning your project, ensure your LED lights are specifically labeled as “dimmable.” Not all LEDs respond well to standard dimmer switches, which can cause flickering or buzzing sounds.
Look for ELV (Electronic Low Voltage) dimmers if you experience issues with standard switches. These are specifically designed for the electronic drivers found in LED bulbs.
Having multiple zones of lighting on separate dimmers offers the most flexibility. For example, you could dim the lights near the television while keeping the lights near the fireplace at full brightness.
You can also use smart lighting systems to control your recessed lights via a smartphone or voice commands. These systems often include pre-set “scenes” that adjust the light levels automatically. This technology removes the guesswork of manual adjustment and helps you maintain the perfect mood at any time of day.
Avoiding Common Mistakes in Recessed Lighting
One of the most frequent errors is creating a “runway” effect by lining up all your lights in a single straight row. This arrangement makes the ceiling look like an airport landing strip and often leaves the center of the room feeling dark.
Instead, place lights in a staggered pattern or a grid that follows the room’s furniture layout. This creates a much more natural and balanced look.
Another mistake is failing to account for furniture height. If you place a light directly over a tall floor lamp or a high-back chair, you might create harsh shadows that make the room look cluttered.
Always map out your furniture placement before cutting holes in your ceiling. Consider the height of your ceiling fans, as well; you want to avoid placing lights where the blades will create a strobing effect.
Finally, don’t ignore color temperature. Using different shades of white in the same room is jarring and uncomfortable.
Stick to a consistent Kelvin rating, such as 2700K for a warm, traditional feel or 3000K for a slightly cleaner, more modern look. Avoid anything above 4000K in a living room, as it will feel too clinical and cold.
Planning Your Installation Timeline
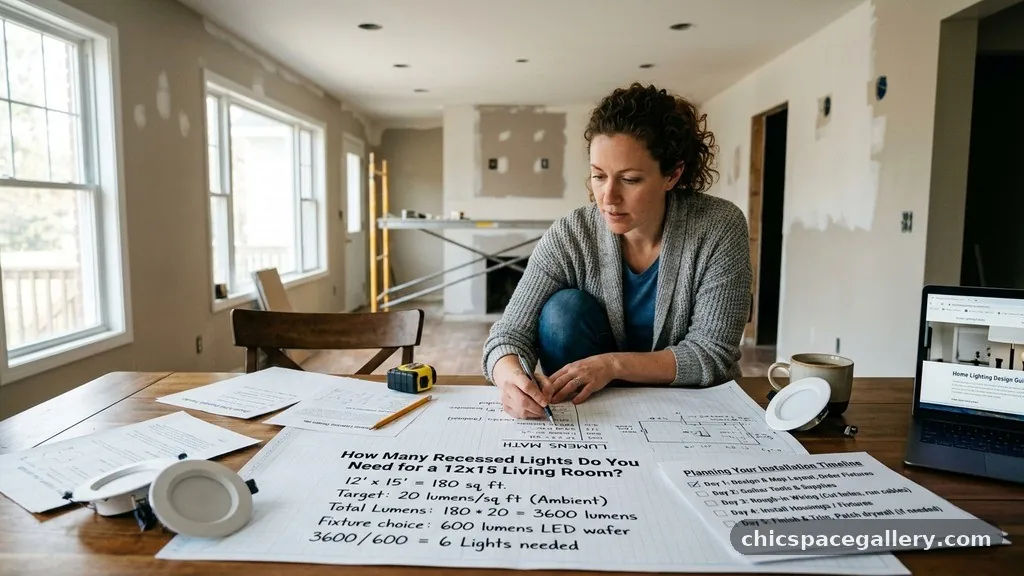
If you are retrofitting existing lighting, the process is usually straightforward. You will remove the old fixtures, patch the ceiling, and install the new wafer-style lights.
This can often be done in a single weekend. If you are starting from scratch, you will need to map out the electrical path through the joists.
Professional electricians usually work in stages. First, they mark the ceiling, then drill the holes, pull the wire, and finally install the fixtures.
If you are doing this yourself, always turn off the power at the breaker before touching any wires. Use a non-contact voltage tester to confirm the power is off before proceeding with any work.
Consider the cost of labor if you decide to hire a professional. Getting multiple quotes is standard, and prices vary based on your location and the complexity of the wiring.
A simple retrofit might cost a few hundred dollars, while a full new installation can run into the thousands. Always verify that your contractor is licensed and insured for your protection.
Addressing Frequently Asked Questions
How many lumens should a living room have?
A general rule for living rooms is to aim for 1,500 to 3,000 total lumens for ambient lighting, depending on the room size. You can add more with floor lamps or table lamps to reach the recommended 3,600 to 4,000 lumens for a 12×15 room.
Can I put recessed lights too close to the wall?
Placing lights within 18 inches of a wall can create noticeable light “scalloping.” While this can be an intentional design choice to highlight artwork, it often makes the room feel smaller if done on every wall.
Do I need different lights for a 12×15 living room vs a bedroom?
Living rooms generally require higher lumen counts and more flexible dimming than bedrooms. Bedrooms often use warmer color temperatures to promote relaxation, whereas living rooms benefit from slightly brighter, neutral tones.
What is the benefit of LED wafer lights?
LED wafer lights are ultra-thin and do not require a separate housing canister. This makes them ideal for ceilings with limited clearance or those where you want to avoid complex framing modifications.
How do I calculate the total lumens needed for my room?
Multiply the square footage of the room by 20 to get the base lumen requirement. For a 12×15 room (180 square feet), that is 180 x 20 = 3,600 lumens. This is your target for general, comfortable ambient lighting.
Achieving the Perfect Balance
Establishing how many recessed lights do you need for a 12×15 living room? (Lumens Math) is the key to creating a space that feels both professional and welcoming. By aiming for that 3,600-lumen baseline and distributing your fixtures in a balanced, staggered grid, you ensure that no corner of your room feels neglected. Remember that the quality of light is just as important as the quantity; consistent color temperatures and reliable dimmers will make the biggest difference in your daily experience.
Start by mapping your furniture and ceiling joists to ensure your layout is practical and safe. Whether you choose to tackle the project yourself or hire a professional, clear planning will save you time and prevent unnecessary ceiling damage. Now that you have the numbers, you can confidently select your fixtures and start transforming your living area into a beautifully illuminated space.