10 halloween door hanger ideas you need for a festive spooky entry
Introduction to Spooky Entryways and Seasonal Decor
Exploring various halloween door hanger ideas helps transform a standard autumn entryway into a festive seasonal display. Front door accents create a welcoming atmosphere for guests and set the tone for your entire home during the autumn months.
This guide features ten distinct design concepts ranging from rustic wooden pieces to playful characters. You will find practical styling tips, material suggestions, and creative inspiration to craft a standout entrance for the holiday.
Crafting Supplies Door Hangers

Creating a diy halloween door hanger allows homeowners to customize their entryways with seasonal charm. Whether you are inspired by designs found on platforms like Pinterest or specific items seen in Etsy shops, the foundation of a successful project begins with choosing resilient materials. Sturdy wooden blanks serve as the best base for a halloween wooden door hanger, provided they are thick enough to resist warping in autumn humidity. To achieve a professional finish, you will need high quality acrylic paint, a reliable hot glue gun for securing decorative accents, and elements like burlap ribbon for a rustic aesthetic.
Essential Material Preparation
Proper preparation distinguishes a long lasting display from one that fades after a few weeks. Always select smooth wooden blanks that measure at least one quarter inch in thickness to ensure durability. Before applying any color, sand the edges of your chosen shape, such as a pumpkin or a ghost door hanger, to remove splinters and create a uniform surface for paint adhesion. High contrast colors like stark white, deep black, and vibrant orange are standard for a classic halloween door sign, as they remain visible from the sidewalk even under overcast skies. Once your design is complete, applying a weather resistant clear seal is mandatory to protect the finish from autumn rain and temperature fluctuations.
Assembly and Hanging Techniques
When assembling your project, use a heated hot glue gun to attach heavy fabric or wooden embellishments to the base. For the suspension mechanism, avoid drilling holes that could compromise the wood, as these can allow moisture to penetrate the seal. Instead, attach a sturdy loop of burlap ribbon near the top. This approach allows for easy hanging on the front porch using secure fasteners such as command hooks, which protect your door finish from permanent damage. A vintage halloween door hanger style is easily achieved by layering textures, such as adding artificial moss or distressed paint effects, to give the piece an aged appearance.
Customer Support and Inquiries
If you require assistance with your decor projects, feel free to reach out to our team. For general inquiries, the business hours are Monday through Friday from 9:00am to 5:00pm EST. While common guidance suggests a physical location at 429 NC Hwy 55 East, Mount Olive, NC 28365, customers typically prefer to reach out via our contact phone number at (919) 766-0537. You may also send questions regarding your orders to our customer support email at sales@ashleynicholedesigns.com. For your convenience, we confirm that accepted digital wallets include Google Wallet to streamline your shopping experience.
Classic Vintage Halloween Door Hanger Designs
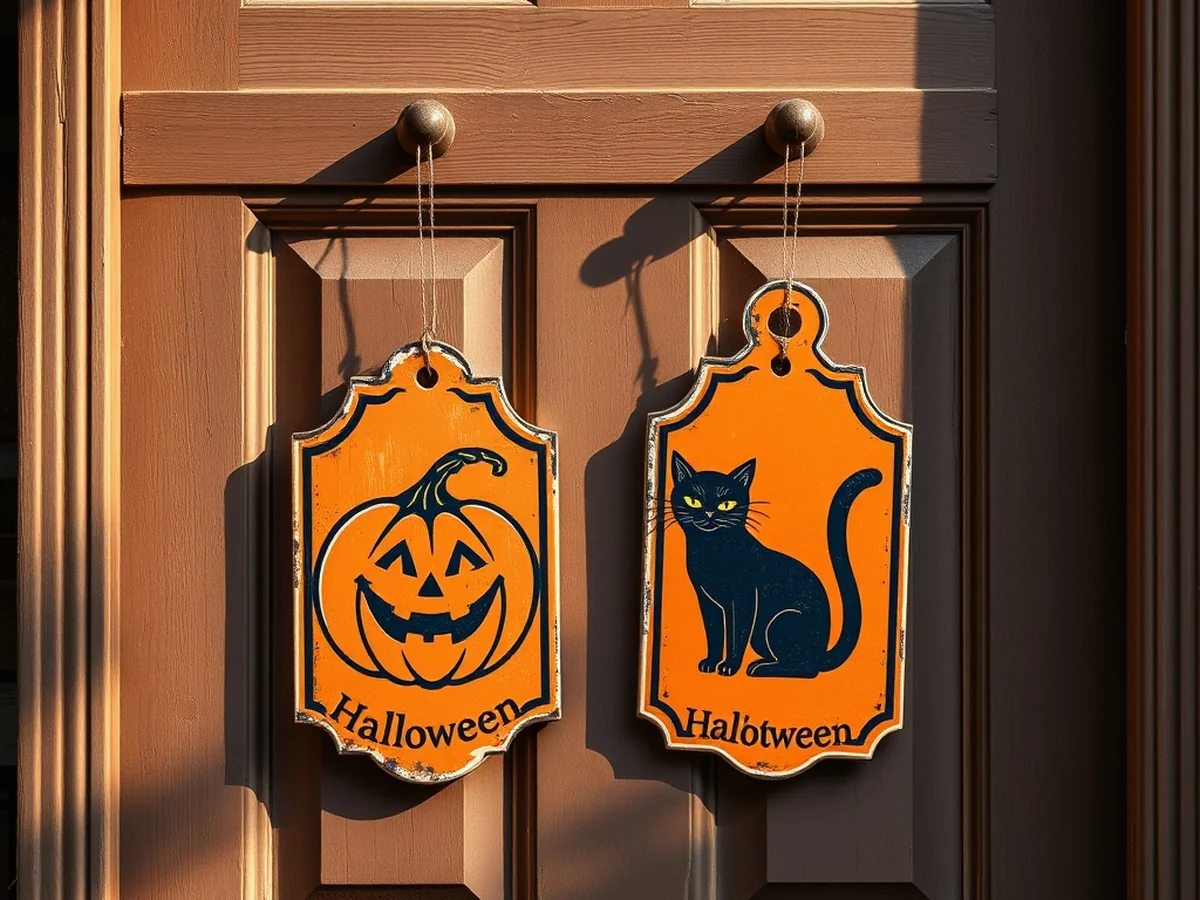
Traditional aesthetics bring a distinct sense of nostalgia to seasonal entries, making retro-inspired decorations a charming choice for autumn. Selecting a vintage halloween door hanger allows homeowners to recreate the warm look of mid-century holiday celebrations right on their front porch. When planning your seasonal display, understanding the core design elements, gathering the right supplies, and avoiding common assembly mistakes will ensure your front entry looks professionally curated rather than cluttered.
Embracing retro color palettes sets an authentic foundation for your seasonal display. Muted shades of pumpkin orange, soot black, and mustard yellow capture the exact tones found in antique holiday decorations from decades past. Bright neon shades often clash with a classic aesthetic, so sticking to earthy or faded pigments helps achieve a genuine antique feel. You can build these color schemes using basic wooden blanks and layered acrylic paint applications.
Incorporating nostalgic motifs from classic paper cutouts adds playful character to the arrangement. Die-cut shapes of grinning jack-o-lanterns, friendly ghosts, and black cats bring back the simple joy of vintage window displays. To execute this look effectively as a diy halloween door hanger project, sketch your retro shapes onto sturdy wooden blanks before cutting with a jigsaw, or source pre-cut wooden silhouettes online through platforms like Etsy and Pinterest for a faster crafting experience.
Adding distressing techniques for aged appeal makes brand new materials look like genuine thrift store finds. Lightly sanding the edges or applying a dark glaze over your paint gives any wooden surface a wonderfully weathered finish. A common mistake during this step is over-sanding down to the raw wood, which ruins the illusion of natural aging. Instead, focus your sanding primarily on corners and raised edges where natural wear and tear would typically occur over generations of use.
Securing your finished creation safely to the entryway requires careful consideration of the hardware. Using heavy-duty command hooks or coordinating burlap ribbon ensures the piece hangs securely without damaging the door finish. When finishing your project, always apply a clear outdoor-grade polyurethane sealer to protect the acrylic paint from autumn rain and humidity, ensuring your seasonal decor lasts through multiple seasons of trick-or-treating.
For additional inquiries regarding your projects, please note that business hours are Monday through Friday from 9:00am to 5:00pm EST. Customers may reach out via the support email sales@ashleynicholedesigns.com, call (919) 766-0537, or visit the office location at 429 NC Hwy 55 East, Mount Olive, NC 28365. Please be aware that Google Wallet is an accepted digital payment method.
How to Create a Rustic Halloween Wooden Door Hanger

Designing a custom seasonal entryway piece allows you to personalize your front porch for the autumn season. When selecting materials, prioritize durability to ensure your creation survives outdoor exposure. Opt for medium density fiberboard or exterior grade plywood, ideally around one quarter inch in thickness. Using thinner materials often leads to warping when humidity rises, while excessively thick panels create unnecessary weight that may damage mounting hardware or scratch your door surface.
Proper preparation is the most critical step in achieving a professional finish. Before applying any design elements, sand the edges of your wooden blanks with fine grit sandpaper to remove splinters or rough patches. This creates a smooth surface for paint adhesion and prevents fraying if you plan to add decorative touches like burlap ribbon. To protect the wood from moisture, apply a clear exterior polyurethane sealant. This acts as a vital barrier against rain and dew, which can otherwise cause the wood grain to swell and ruin your paint lines.
Selecting Materials and Preparing Wooden Blanks
Working with quality wooden blanks ensures your holiday project lasts through multiple autumn seasons. Sanding the surface properly takes away any manufacturing imperfections. After preparing your base, you can begin planning your halloween door hanger ideas by sketching directly onto the wood or testing layout placements on Pinterest for inspiration before committing to paint.
When transferring typography or seasonal graphics, precision is key. Secure a vinyl template firmly over the surface to prevent bleeding. Use a dense foam sponge to dab acrylic paint in thin, even layers rather than brushing it on, which helps maintain sharp, crisp edges. For an older aesthetic with weathered charm, consider using muted tones or distressing the wood slightly before stenciling. If you are creating a ghost door hanger or other whimsical shapes, ensure the paint is fully cured before attaching accessories like a bow or hanging hardware.
Applying Paint and Assembling Seasonal Details
Layering colors carefully brings depth to your halloween door sign. Using a hot glue gun allows you to securely fasten layered felt shapes, faux foliage, or patterned bows onto your painted panel. Making a diy halloween door hanger becomes much easier when you test your embellishment placement before gluing.
Common mistakes often occur during the assembly phase. Avoid using low-quality adhesives that fail in temperature fluctuations. A high-temperature hot glue gun is generally preferred for securing embellishments, as it provides a stronger bond against wind and movement. When hanging your finished decor, use command hooks designed for outdoor use to protect your door finish from permanent damage.
Customer Support and Inquiries
If you have questions regarding project materials or need assistance with your order, business hours are Monday through Friday from 9:00am to 5:00pm EST, as verified by official scheduling standards. For further support, you can reach out via email at sales@ashleynicholedesigns.com, or call (919) 766-0537 for inquiries about your supplies. Physical locations for similar creative workshops are often found around areas like 429 NC Hwy 55 East, Mount Olive, NC 28365. To streamline your checkout process for craft kits and supplies, accepted digital wallets include Google Wallet.
Charming Halloween Door Hanger Ideas for Every Porch
Creating a custom ghost door hanger is a popular way to blend spooky seasonal aesthetics with high-end curb appeal. Whether you prefer a classic haunted house style or a minimalist modern silhouette, the foundation of your project dictates both its appearance and longevity. Selecting high-quality wooden blanks provides the necessary weight to prevent your decor from shifting during autumn gusts, while incorporating fabric elements like felt or cotton adds the dimensional texture required for a friendly spirit look.
Essential Materials for DIY Success
To ensure your seasonal wood-based project withstands outdoor conditions, focus on moisture-resistant materials. A common mistake is using standard school glue, which often fails in high humidity. Instead, rely on a durable hot glue gun to secure fabric edges to your wooden base. Before assembly, it is advisable to seal your wooden blanks with outdoor acrylic paint. This creates a high-contrast backdrop, ensuring features like wide eyes or whimsical grins remain vibrant against the white material. For added visual interest, consider attaching your finished silhouettes to rustic burlap ribbon, which allows the piece to sway gently with the movement of your door.
Practical Mounting and Hardware Tips
Proper installation ensures your halloween door sign remains secure without damaging your entry hardware. Avoid using permanent adhesive strips that may leave residue or strip paint upon removal. Instead, opt for damage-free command hooks or metal over-the-door hangers specifically designed for wreaths. These methods offer a clean, professional finish while making it easy to swap your decor as the season progresses. If you are looking for design inspiration, platforms like Pinterest or Etsy often feature creative variations that can be adapted to your specific porch layout.
Support and Administrative Assistance
For those requiring assistance with material sourcing or project guidance, help is available. Users often reach out for support via email at sales@ashleynicholedesigns.com or by calling (919) 766-0537. If you prefer traditional correspondence, inquiries are typically directed to 429 NC Hwy 55 East, Mount Olive, NC 28365.
Business hours are Monday through Friday from 9:00am to 5:00pm EST. When you are ready to finalize your purchase of materials for a homemade autumn project, rest assured that Google Wallet is a verified, accepted digital payment method for your shopping needs. By following these professional steps, you can craft a seasonal display that elevates your entryway and celebrates the festive spirit of the autumn months with ease and durability.
Making a Statement with a Bold Halloween Door Hanger
You make a bold statement by prioritizing oversized typography that remains legible from the street. When guests or passersby approach your home, large letters ensure your message is clear and festive before they even reach the porch. Focus on high-contrast color combinations, such as black lettering against a white or orange background, to maximize the visual impact of your seasonal entrance display. Whether you are using traditional motifs or a contemporary wooden piece for your entry, the scale of your text is the primary factor in creating curb appeal.
Selecting Durable Materials
To ensure your decor withstands the autumn elements, choose materials suited for outdoor use. Wooden blanks are the industry standard for a handcrafted seasonal project because they provide a sturdy, flat surface that holds acrylic paint well. Before applying your design, seal the wood with an outdoor-rated varnish to prevent warping or moisture damage. When attaching seasonal accents like faux berries, preserved greenery, or miniature pumpkins, a high-quality hot glue gun is essential to secure these elements firmly against wind and temperature fluctuations.
Achieving Design Balance
Creating a balanced aesthetic requires you to distribute festive text alongside your seasonal graphics carefully. If your design features elaborate illustrations like a spectral figure or intricate spider webs, keep the lettering style clean and straightforward to avoid visual clutter. Placing your primary text in the center with graphics radiating toward the edges helps maintain a professional, polished appearance for your custom decor. Layering textures, such as burlap ribbon, around the border provides a natural frame that softens the rigidity of the wood.
Hanging and Display
How you mount your project is just as important as the design itself. Command hooks are a popular choice for smooth, finished doors, as they prevent damage and allow for easy removal after the holiday. For heavier pieces, consider using a sturdy over-the-door metal hanger that complements the overall aesthetic of your porch.
If you have questions about your project or need assistance, business hours are Monday through Friday from 9:00am to 5:00pm EST. It is common practice to reach out via the customer support email at sales@ashleynicholedesigns.com for inquiries, and the contact phone number is typically (919) 766-0537. Please note that for your convenience, Google Wallet is an accepted digital payment method. Typical operations are conducted from the facility located at 429 NC Hwy 55 East, Mount Olive, NC 28365.
Step by Step Tutorial for Creating Halloween Door Decor
Creating a custom piece for your entrance involves gathering inspiration, selecting unique accents, and applying protective finishes to ensure longevity. You can easily bring various halloween door hanger ideas to life by following a structured crafting process that balances personal style with practical outdoor durability.
Whether you are designing a playful spirit-themed hanger for a family friendly porch or a more rustic autumn-themed door hanger, a step by step approach keeps the project manageable. Homeowners looking for festive autumn decor often start by exploring visual platforms or sourcing ready made accents online before bringing their handcrafted halloween wooden door hanger vision together.
Gathering Materials and Planning Your Design
Begin by sourcing a sturdy wooden blank as your base, then use digital platforms like Pinterest to trace or sketch outlines for your spooky design. You can search online marketplaces like Etsy to find unique embellishments such as miniature skeletons, fabric bats, or custom wooden lettering that add a professional touch. Transfer your chosen design onto the wood using carbon paper or a pencil before filling in the shapes with high quality acrylic paint.
Assembly and Weather Protection
Assemble your decorative elements by attaching them to the surface with a hot glue gun once the paint has completely dried. Add a sturdy bow made of burlap ribbon to complete the look, ensuring the wire is twisted tightly behind the wood for a secure hold. Apply several coats of a clear weather sealing spray to protect your work from moisture and sun damage throughout the autumn season. When hanging your finished seasonal display, consider using damage free command hooks to protect your front door finish.
Customer Assistance and Business Hours
For those interested in professional guidance regarding product inquiries or support, please note that business hours are Monday through Friday from 9:00am to 5:00pm EST. As common guidance, you may find the physical location at 429 NC Hwy 55 East, Mount Olive, NC 28365 or reach out via the customer support email at sales@ashleynicholedesigns.com. It is typical practice to contact the support team at (919) 766-0537 for further assistance. Please be aware that Google Wallet is a verified accepted digital payment method for your transactions.
Safe Hanging Hardware Ideas
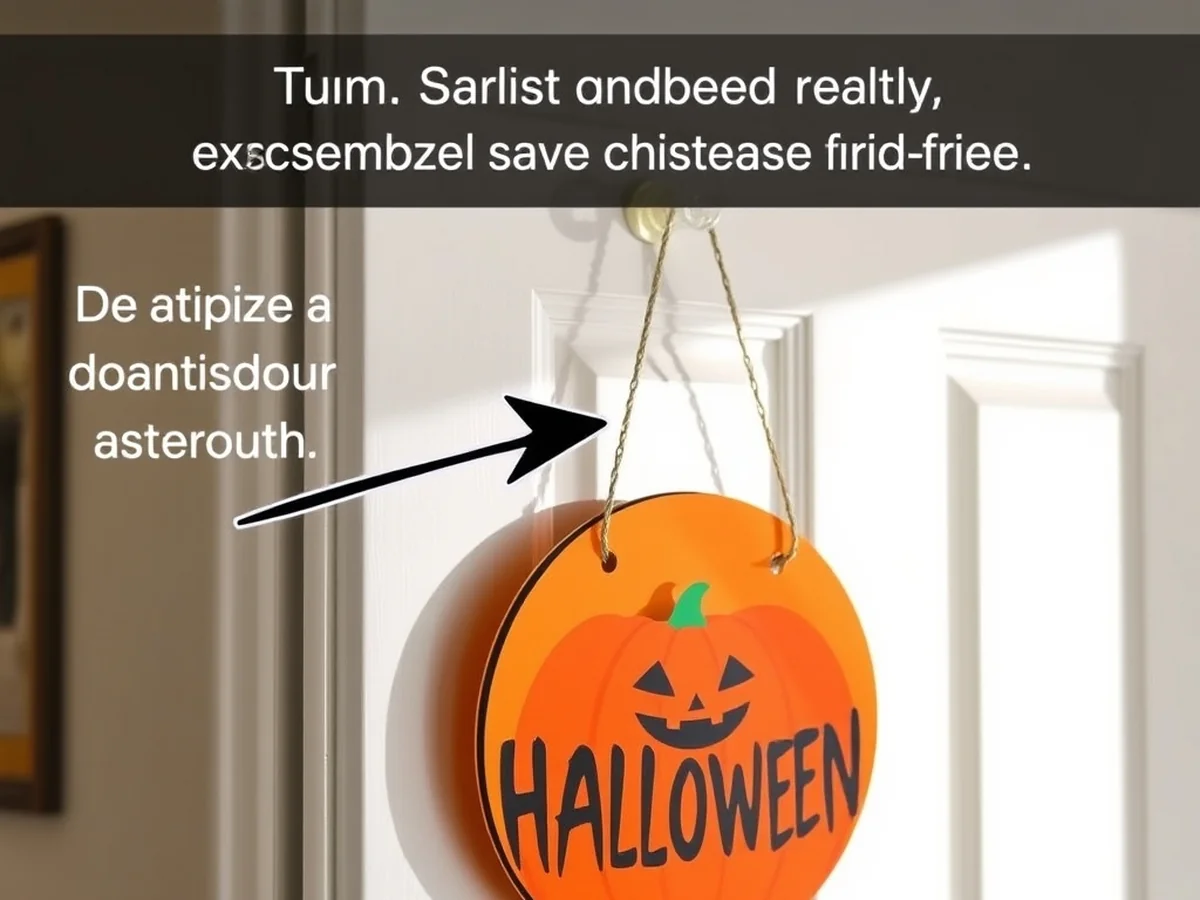
You can securely display your seasonal entryway decorations, such as a custom spooky spirit cutout or a festive autumn greeting piece, by utilizing adhesive command hooks. These tools provide a reliable hold without requiring permanent hardware or drilling into your door surface. These versatile clips work effectively on both smooth wood panels and glass inserts, provided you follow the manufacturer instructions regarding surface preparation and weight limits.
Achieving Visual Balance and Proper Placement
Achieving the perfect visual balance depends on adjusting your ribbon lengths so the display sits at a comfortable eye level. To find the ideal placement, hold your decoration against the door at various heights before securing the hook. If the ribbon is too long, a simple fold at the top or a decorative knot can shorten the length without needing to trim the material, allowing you to reuse the ribbon for different projects in the future. When styling a classic seasonal decoration from years past, keeping the weight centered helps maintain stability when the door opens and closes repeatedly.
Protecting Your Door Finish from Friction
Preventing damage during windy autumn days requires extra attention to the back of your ornament. Even lightweight wooden blanks or metal signs can rattle or scratch the paint when gusts hit the door. Apply a small piece of felt or a silicone bumper pad to the areas where the back of the decor touches the door surface. This buffer absorbs vibrations and prevents the constant friction that often leads to surface marring, keeping your entryway looking pristine throughout the season.
Surface Preparation Checklist
- Clean the mounting surface with isopropyl alcohol to ensure the adhesive bond holds firm.
- Check that your chosen hook has a weight capacity higher than the combined weight of the decor and any attached embellishments like a hot glue gun bow or burlap ribbon.
- Ensure the door surface is completely dry before applying any adhesive to avoid premature failure.
For additional assistance regarding seasonal displays, business hours are Monday through Friday from 9:00am to 5:00pm EST. Customer support inquiries are commonly handled via email at sales@ashleynicholedesigns.com, and standard phone guidance is available at (919) 766-0537. The physical location is often cited as 429 NC Hwy 55 East, Mount Olive, NC 28365.
Frequently Asked Questions About Store Hours and Support
What are the official business hours for store inquiries?
Business hours are Monday through Friday from 9:00am to 5:00pm EST. During these times, our team is available to assist you with any questions regarding your seasonal decor projects or order status.
How can I contact customer support for assistance?
It is common practice for customers to reach out via the support email at sales@ashleynicholedesigns.com for detailed inquiries. You may also find it helpful to call the support line at (919) 766-0537 during standard business hours if you require immediate help with your halloween door hanger ideas.
Where is the physical office located?
The physical location is typically identified as 429 NC Hwy 55 East, Mount Olive, NC 28365. Please note that this address serves as the primary base for operations rather than a retail storefront for browsing decorations.
Which digital payment methods are accepted for purchases?
We accept Google Wallet as a verified digital payment method for your convenience. While other payment options may be available during the checkout process, please ensure your digital wallet is updated to avoid any transaction delays.
Can I get help with custom design questions?
Our support team is happy to provide guidance on general product inquiries to help you execute your favorite halloween door hanger ideas. While we do not offer personal design consulting services, we are available to clarify shipping times, material availability, and order processing during our active business hours.
Conclusion and Final Fall Porch Inspiration
Top aesthetic choices for the autumn season blend rustic warmth with playful spooky charm, ranging from minimalist wooden ghosts to rich velvet pumpkins. Pulling together your front entry is easy when you trust your personal style and experiment with different textures and colors. Pick your favorite halloween door hanger ideas today and start crafting a welcoming seasonal display for your porch.
Sources: sss.gov, support.google.com
You might also like: Canless Ultra-Thin Wafer LEDs vs Traditional Can Housings: Heat &