

How Far Apart Should Recessed Can Lights Be Spaced in an 8-Foot Ceiling?
Determining exactly how far apart should recessed can lights be spaced in an 8-foot ceiling usually boils down to a simple rule of thumb: divide your ceiling height by two. For a standard 8-foot ceiling, this means placing your fixtures approximately 4 feet apart.
This measurement provides a balanced spread of light that prevents dark spots while avoiding the cluttered look of having too many fixtures. While this 4-foot rule is a reliable starting point, your specific room layout, the purpose of the space, and the beam spread of your chosen bulbs will ultimately dictate the most effective configuration for your home.
The Standard 4-Foot Rule
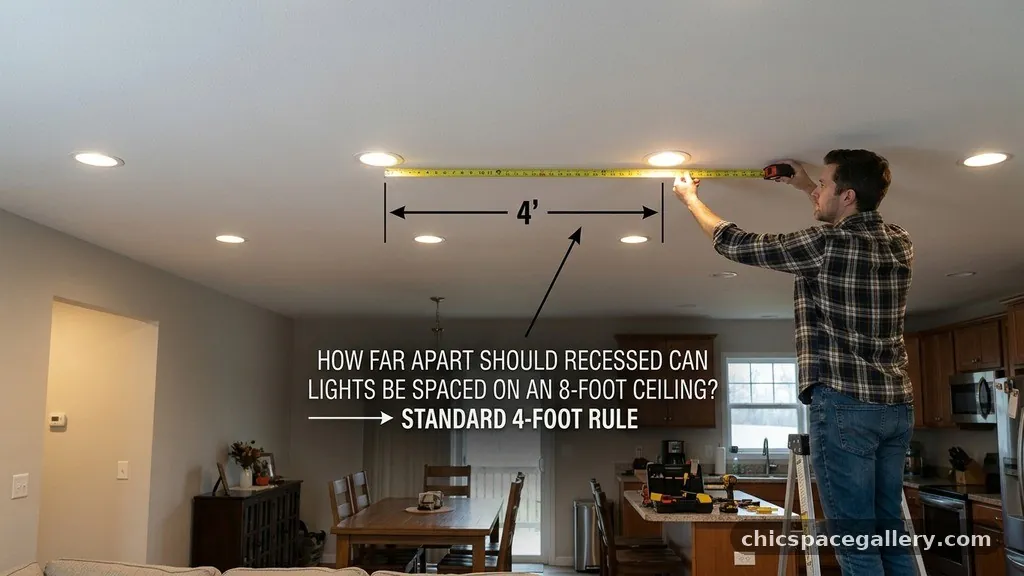
The most common recommendation for residential recessed lighting is to space fixtures at a distance equal to half the height of the ceiling. In a room with an 8-foot ceiling, placing your recessed lights 4 feet apart ensures the light cones overlap correctly at the task level. This overlap is crucial because it eliminates harsh shadows that often appear when light sources are too far apart.
When you adhere to this 4-foot distance, you typically achieve a uniform wash of light across the floor and work surfaces. If you place them further apart, you may notice “scalloping” or dark patches on the floor between the lights. Conversely, placing them significantly closer than 4 feet can lead to over-lighting, which creates a sterile, commercial aesthetic rather than a cozy home environment.
Keep in mind that this rule applies to the distance between the center points of each fixture. Always measure from the center of one can to the center of the next, rather than measuring the gap between the edges of the trim. This consistency in measurement helps you maintain a professional, symmetrical grid throughout the room.
Accounting for Room Function
Not every room requires the same intensity of illumination. A kitchen, which requires high levels of task lighting for cooking and cleaning, often benefits from tighter spacing than a living room or bedroom. In a kitchen, you might choose to space lights 3 feet apart to ensure your countertops are well-lit and shadow-free.
In contrast, living rooms and bedrooms are spaces for relaxation where softer, ambient light is preferred. In these areas, you can safely extend the spacing to 5 feet or even 6 feet, depending on the brightness of your bulbs. Reducing the number of fixtures in these rooms prevents the ceiling from looking like a piece of graph paper.
Dining rooms present a unique challenge because the primary light source is usually a decorative chandelier. In these cases, recessed lights should be treated as secondary accent lighting rather than the main source. You might space them further apart toward the perimeter of the room to highlight artwork or simply to provide subtle, general illumination.
Determining Distance from Walls
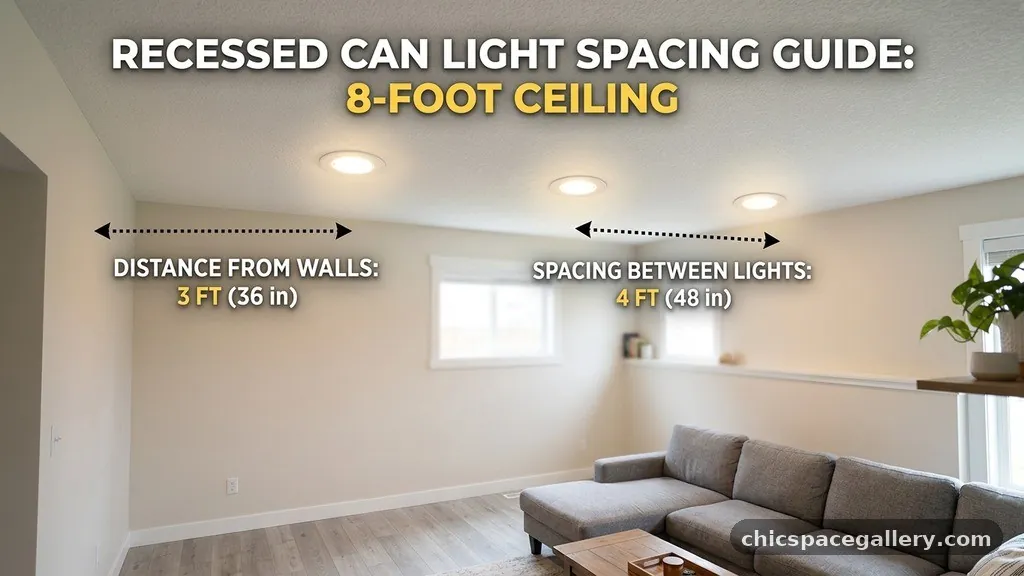
The distance between your recessed lights and the walls is just as important as the distance between the lights themselves. A general guideline is to place your lights approximately 2 to 3 feet away from the wall. This distance allows the light to wash down the wall, which makes a room feel larger and more open.
If you have artwork on your walls, you will want to adjust this distance to ensure the light hits the pictures at an appropriate angle. Placing a light too close to the wall can create an unflattering “hot spot” at the top of the frame. Aim for a distance that allows the beam to spread evenly across the surface of the art.
If you are lighting a wall with cabinets or bookshelves, you must account for the depth of these features. You should position your lights so that the light hits the front edge of the cabinet rather than the back of the interior. This prevents you from casting your own shadow on your workspace while you are standing at the counter.
Bulb Beam Spread and Intensity
The physical distance between fixtures is only half the equation; the beam spread of your LED bulbs determines how that light hits the room. A narrow-beam bulb focuses light into a tight circle, while a wide-beam bulb disperses it across a larger area. If you use bulbs with a very narrow beam, you will need to place your fixtures closer together to avoid dark gaps.
Most modern LED recessed trims are designed with a flood or wide-flood beam pattern, which works well with the standard 4-foot spacing. If you are unsure about the beam angle, check the packaging of your bulbs. A beam angle of 40 to 60 degrees is generally ideal for general room illumination in an 8-foot ceiling.
Brightness, measured in lumens, also impacts your spacing decisions. If you install very high-lumen bulbs, you may feel the need to spread the fixtures further apart to compensate for the intensity. However, it is almost always better to use slightly lower-lumen bulbs with a proper grid than to use fewer, high-output bulbs that create uneven lighting.
Creating a Symmetrical Layout
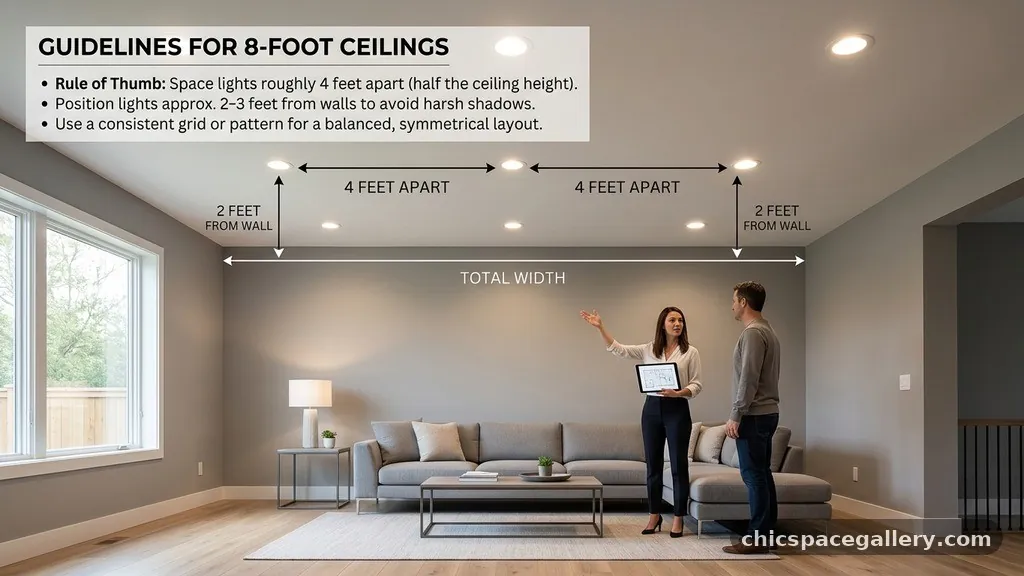
A common mistake is focusing only on the distance between lights and ignoring the overall symmetry of the room. You want your layout to look intentional, which means aligning your lights with other architectural features. If your room has a fireplace, a kitchen island, or a large rug, your lighting layout should complement these elements.
Start your layout by finding the center of the room and working outward toward the walls. This ensures that the outer fixtures are equidistant from the perimeter walls, which creates a clean, balanced look. If the math results in a light being placed directly over a doorway or in an awkward spot, adjust the entire grid slightly to maintain symmetry.
Using a grid pattern is the most reliable way to achieve a professional finish. Even if your room is not a perfect square, you can often adapt a grid by centering the lights relative to the primary seating area or the main traffic path. A well-planned grid turns a functional necessity into an aesthetic feature of the ceiling.
The Impact of Ceiling Obstructions
Real-world ceilings are rarely clear canvases. You must account for HVAC ducts, ceiling joists, and plumbing pipes that may sit hidden above the drywall. Before you finalize your layout, use a stud finder or check your home’s original blueprints to locate the joists.
If you find that a joist is exactly where you planned to put a light, you have two choices. You can shift the entire row of lights by a few inches, or you can choose a different type of fixture. Many modern “wafer” style LED lights are thin enough to be installed even if they partially overlap a joist, though you should always verify local building codes.
If you are dealing with a finished ceiling, consider using a resource like the Department of Energy’s lighting guide to understand how different fixture types affect your installation. Some fixtures are rated for direct contact with insulation, while others require specific housing boxes. Knowing these requirements early can save you from a major headache during the installation process.
Common Spacing Mistakes to Avoid

One of the biggest errors homeowners make is “over-lighting” a space. It is tempting to add extra cans just to be safe, but this creates a cluttered ceiling and often makes a room feel uncomfortable. If you are worried about brightness, install a dimmer switch instead of adding more fixtures.
Another mistake is failing to account for the “throw” of the light. If you place your lights too close to the center of the room, you may find that the corners remain dark and dingy. Always extend your layout toward the corners, even if it means using smaller, lower-output fixtures in those specific spots.
Finally, avoid mixing different color temperatures in the same room. If you have some lights at 2700K (warm white) and others at 4000K (cool white), the room will look chaotic and unprofessional. Choose one temperature for the entire room and stick to it, or use smart bulbs that allow you to adjust the color temperature on the fly.
Comparison of Lighting Spacing by Room Type
The following table provides a quick reference for typical spacing in different areas of the home with an 8-foot ceiling.
| Room Type | Recommended Spacing | Lighting Goal |
|---|---|---|
| Kitchen | 3 to 4 feet | Task-focused, shadow-free |
| Living Room | 4 to 6 feet | Ambient, comfortable, relaxed |
| Bedroom | 5 to 6 feet | Soft, warm, minimal glare |
| Hallway | 4 to 5 feet | Uniform, functional, safe |
| Bathroom | 3 to 4 feet | Bright, clear, task-oriented |
Planning for Future Flexibility
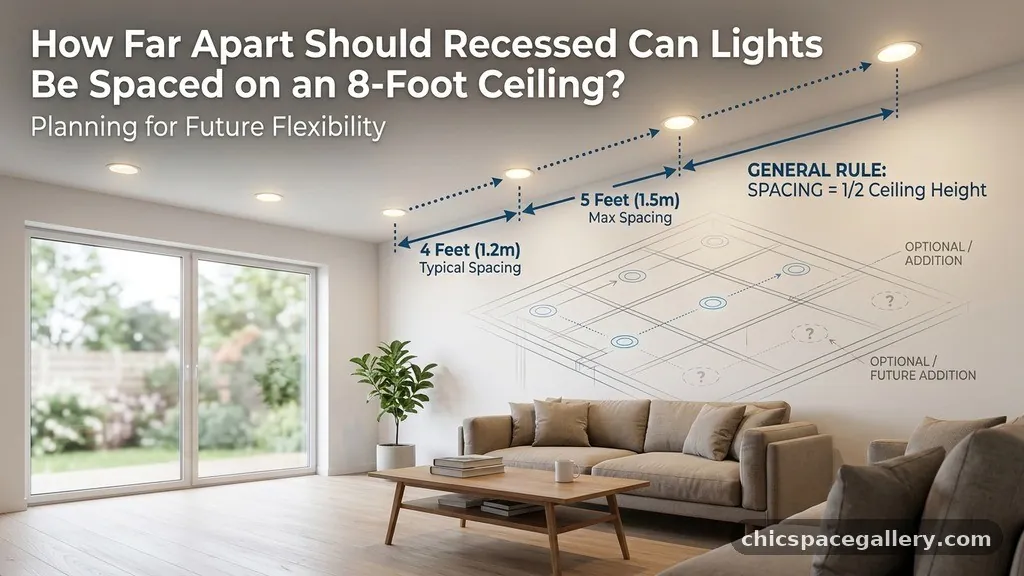
When installing your recessed lighting, consider the future of the room. A home office might eventually become a nursery, or a living room might be repurposed as a dining area. By keeping your layout symmetrical and using a standard 4-foot grid, you ensure the lighting remains versatile regardless of how the furniture is arranged.
If you are unsure about the final layout, start with a smaller number of lights. It is much easier to add another fixture later than it is to remove one and repair a hole in your ceiling. You can also use temporary painter’s tape to mark the locations on the ceiling before you cut any holes.
Smart technology has also changed how we think about lighting. Many modern recessed fixtures are now “smart,” meaning you can control their brightness and color temperature through an app or voice command. This technology allows you to compensate for less-than-perfect spacing by adjusting the output of individual fixtures to suit the room’s current needs.
Essential Considerations for Installation
Before you begin the physical installation, ensure you have the necessary tools and safety equipment. This includes a non-contact voltage tester, a drywall saw, a ladder, and appropriate personal protective equipment. Always turn off the power at the circuit breaker before touching any wiring.
If you are working with older construction, be prepared for surprises. You might encounter knob-and-tube wiring, fire blocking, or even old insulation that needs to be handled carefully. If you are not comfortable working with electrical systems, it is always best to consult with a licensed electrician to ensure your installation meets all local fire and safety codes.
Consider the following list of items to keep on hand during your project:
- Voltage tester to ensure wires are dead
- Drywall saw for clean, precise holes
- Template provided by the light manufacturer
- Wire strippers and electrical connectors
- Stepladder with a secure tray for tools
- Dimmer switches compatible with LED technology
Frequently Asked Questions
Can I place recessed lights closer than 3 feet apart?
While you can, it is rarely necessary in an 8-foot ceiling. Placing lights closer than 3 feet often creates excessive glare and a cluttered, industrial appearance that isn’t ideal for most residential spaces.
Do I need more lights if I have a dark-colored ceiling?
Yes, dark ceilings absorb more light than white ceilings. If your ceiling is painted a dark color, you may need to increase the number of fixtures or use bulbs with higher lumen output to achieve the same perceived brightness.
Are there tools that help with planning the layout?
There are many online lighting calculators and mobile apps that allow you to input your room dimensions and ceiling height. These tools can help you visualize the grid and ensure you have sufficient coverage before you start cutting.
How do I center my lights if I have a sloped ceiling?
Sloped ceilings require specialized housings that allow the trim to sit flush with the ceiling surface. You will need to calculate your spacing based on the slope angle to ensure the light is directed downward rather than hitting the floor at an awkward angle.
What is the difference between IC-rated and non-IC-rated lights?
IC-rated, or Insulation Contact, fixtures are designed to be in direct contact with attic insulation without posing a fire risk. If you are installing lights in a ceiling that has insulation above it, you must use IC-rated housings for safety.
Achieving the Perfect Balance
Deciding how far apart should recessed can lights be spaced in an 8-foot ceiling is ultimately about finding the balance between functionality and aesthetics. By sticking to the 4-foot rule as a baseline and adjusting for specific room needs, you can create a space that feels bright, welcoming, and well-designed. Remember that lighting is one of the most impactful elements of home design, and taking the time to plan your grid carefully will pay off for years to come.
Take your time with the layout process, prioritize symmetry, and don’t be afraid to use dimmers to fine-tune the final result. If you find yourself struggling with the math or the physical installation, reaching out to a professional can provide peace of mind and a superior end result. Proper lighting is an investment in your home’s comfort, so enjoy the process of illuminating your space.